Final Product What You'll Be Creating
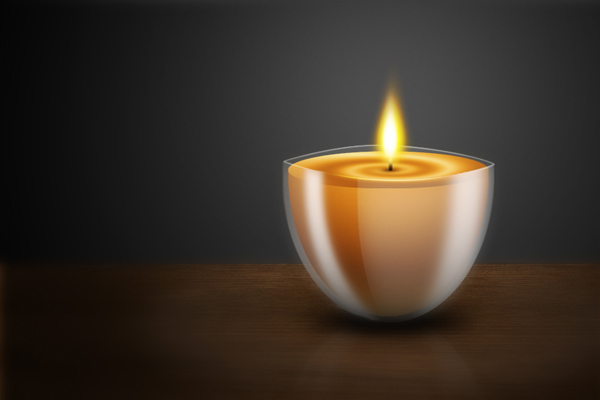
Still life compositions are like photographs in that they portray the details of objects as moments frozen in time. Still life images don’t tell a story, they simply depict the objects themselves. In today’s tutorial we will explore this style of art by creating a still life candle in Photoshop.
Resources Used
The following resources were used during the production of this tutorial:
Step 1
First, create a new file, 900×768 px and with a resolution of 300 ppi. Fill the background layer with a radial gradient as shown below.


Step 2
Now make a new layer and name it as "Candle top". Using the Elliptical marquee tool (M), create a perfect circle by holding down the Shift key while dragging.

Step 3
Fill the entire selection with the colors as indicated below using a Radial gradient.

Step 4
In the "Candle top" layer, select the small thumbnail on the left side of the layer’s name while holding the Cmd key to activate the selection marquee around the circle.

Step 5
Now go to Filter > Distort > Twirl and change the its value to an angle of 490 degrees.

Step 6
Press Cmd + T to activate the resizing handles, then do what is shown below.

Step 7
Create a new layer and name it as "Candle body". Using the Elliptical marquee tool (M), make a shape as shown in figure (a). Then using the Rectangle marquee tool (M) set in Subtract from selection mode, do what was done in figure (b) and the final product should look like (c).

Step 8
Using a Radial Gradient, fill the entire "Candle body" selection with the colors as indicated below.

Your image should look similar to the below image.

Note: Make sure that the "Candle body" layer is placed below the "Candle top" layer.
Step 9
Next add a new layer and name it "Highlights". Now, just as in Step 4, Cmd-click the "Candle body" layer to activate the selection around the shape.

Using the brush tool with a Master diameter of 168px and hardness of 0%, apply a subtle amount of color #985e11 to add a small glow below the body of the candle. This will give an illusion of light passing through the solid translucent body of the candle.

Step 10
Now make a new layer and name it "Highlights-2." Use the same technique as in Step 9 but use the color #ffffff for the brush with a Master diameter of 168px and hardness of 0%.

Step 11
Now add a new layer and name it "glass". Using the Elliptical marquee tool (M) make a shape as shown below.

Next use the Pen tool (P) to draw a shape as shown below. Make sure to select Subtract from selection mode from the pen tool panel before plotting the points. After completing the shape, right-click and choose Make Selection. From the Make selection window, configure the feather radius to 0px then click OK.


Apply a linear Gradient as shown from top to bottom.

Lastly, change its opacity to 7%.

Step 12
Now duplicate the "Glass" layer and rename it "Glass highlights" then change its opacity level back to 100%.

Using the Eraser tool (E), erase the areas as indicated below, leaving a small amount at the bottom.

Step 13
Next, add a new layer and name it "Glass face". Then, using the Elliptical marquee tool (M), make a shape as shown below.

Now using the Pen tool (P), set it to Subtract from selection in the Pen tool panel, then make a shape as shown below. After completing the shape right-click and choose Make selection from the drop down menu. From the Make selection window, adjust its Feather radius to 0px, then hit OK.


Next use the Pen tool (P) to make a shape as shown below, make sure that the Pen tool (P) is set to Subtract from selection mode from the Pen tool (P) panel. Press right-click and choose Make selection from the drop down menu. From the Make selection window, adjust its Feather radius to 0px, then hit OK.


Finally, fill the selection with #ffffff and set its opacity level to 30%.

Step 14
Now add a new layer and name it "Left glow". Then, using the Pen tool (P) draw a line as shown below. Now go to the Brush tool (B) then right-click anywhere in your image to show the brush panel. From the brush panel configure its values with a Master diameter of 20px and hardness of 0%. Then go back to the Pen tool (P), right-click and choose Stroke path from the drop-down menu. From the Stroke path window, define its stroke to use the Brush tool. Hit OK to accept the changes. Then go to Filter > Blur > Gaussian blur and from there, change its radius to 2px then press OK. Lastly, change its opacity level to 80%.


Step 15
Next add a new layer and name it "Right glow". Now use the Pen tool (P), make a shape as shown in figure (a). Then right-click and select Make selection from the drop-down menu. From the Make selection window, configure its feather radius to 0px then hit OK. The effect should look like figure (b). Fill the selection with #ffffff, as shown in figure (c).

Now from figure (c), go to Filter > Blur > Gaussian blur. From the Gaussian blur window, change its radius to 5px then press OK. Next, change its opacity level to 70%. The effect should look like figure (d). Next use the Pen tool (P) to define a shape as shown in figure (e). Next, right-click and choose Make selection from the drop-down menu. From the Make selection window, change its radius to 0px then hit OK. After that, Cmd + Shift + I to invert the selection then hit delete. The final product should look like figure (f). Lastly, change its opacity level to 70%.

Step 16
Add a new layer and name it "Rim highlights". Then, using the Pen tool (P), draw a line as in figure (a). Now go to the Brush tool (B) then press right-click anywhere in your image to show the brush panel. From the brush window, configure its values with a Master diameter of 2px and Hardness of 100%. Then go back to the Pen tool (P) then right-click and choose Stroke path from the drop-down menu as in figure (b). From the Stroke path window, define its stroke path to use the Brush tool as shown in figure (c.) Hit OK to accept the changes. Next, change its blend mode to overlay.


Step 17
Next, add a new layer and name it "Shadow shade". Using the Pen tool (P), make a shape as shown in figure (a). Next right-click and select Make selection from the drop-down menu. From the Make selection window, set the feather radius to 0px. Using the Paint bucket tool (G), fill the entire selection with #000000, as in figure (b). Erase it as shown in figure (c).

Step 18
Add a new layer and name it "Wick Shadow". Using the Brush tool (B), set the Master diameter to 20px with a Hardness of 100%. Place a small dot in the center of the twirl on the top portion of the candle as in figure (a). Hit Cmd + T to activate the resizing handles, as in figure (b). Resize the circle vertically, then go to Filter > Blur > Gaussian blur and setting its radius to 32px. Change the layer’s opacity level to 66%.

Step 19
Next, add a new layer and name it "Wick". Using the Pen tool (P) make a shape as in figure (a). Right-click and choose Make selection from the drop-down menu. From there, adjust its feather radius to 0px. Using the Paint bucket tool (G) fill the entire selection with #000000, as shown in figure (b). Using the Brush tool (B), set the Master diameter to 17px with a Hardness of 0%, apply a small amount of #8b8b8b on top of the wick.

Step 20
Next is to put a gradient "glow" effect on the wick. Add a new layer and name it "Wick burn". Use the colors as indicated below with their corresponding brush size.

Step 21
Now we’ll be creating the flame for the candle. For this part instead of creating a new layer, we’ll be creating a new group, named "Fire group". To create the flame, follow the instructions below with its corresponding layer name, color and brush settings.
Note: Make sure that all of these layers are made inside the Fire group to prevent a cluttered layers palette.

Step 22
Now we’ll make the reflection for the candle. First, duplicate all of the candle layers. You can do this by Cmd-clicking the layers needed. After you’ve selected all the components drag them to the Create a new layer icon in the layers palette, (a). Next, merge all layers by right-clicking within the layers palette while the blue highlights for all the layers is still active. Next, select Merge Layers from the drop-down menu as in figure (b). Now name this layer "Reflection". Next hold Cmd+T to activate the resizing handles then right-click and select flip vertical from the drop-down menu.

Place the image as shown below.

Adjust its opacity level to 6% and erase areas as indicated below using the Eraser tool (E) with a Master Diameter of 257px and Hardness of 0%.

Step 23
Next, let’s add shadow to our candle. To do this, add a new layer and name it "Shadow 100". Next, using the Elliptical marquee tool (M), make an oval shape as shown below. Fill the entire selection with #000000. Go to Filter > Blur > Gaussian blur and set the radius to 7.2px.


Duplicate the "Shadow 100" layer then hit Cmd + T to activate the resizing handles. Scale the duplicated later as shown below, then lower its opacity to 90%.


Step 24
The next step is to add a subtle "Glow" coming from the candle’s flame. To do this, add a new layer and name it "Glow". Use the Brush tool (B) set to Master diameter of 473px and Hardness of 0% with color #ffffff. Follow the indicated position of the brush below.

Set the blending mode of this layer to overlay with an opacity of 50%.

Step 25
Next is to add the table where the candle will be sitting. Open the file named "Wood.jpg", then hit Cmd + T to activate the resizing handles. Right-click and select perspective from the drop-down menu, then change the Wood’s shape as shown below.

Next press Cmd + L to activate the Levels window, then set the values for the three handles as shown below.


Step 26
Next add a new layer and name it "Wood shade". Using the Rectangle marquee tool (M) select an area as indicated below.

Fill the entire selection with #000000.

Using the Eraser tool (E) set to Master Diameter 750px and Hardness of 0% erase the area as indicated below.


Step 27
Next add a new layer and name it "Circle light". Using the Elliptical marquee tool (M) make a shape as shown below. Fill the entire selection with #ffffff.

Go back to the Elliptical marquee tool (M) then right-click. Select Transform selection from the drop-down menu, and change the shape of the oval as shown below.

Hit delete.

Next, go to Filter > Blur > Gaussian blur and set its radius to 7.2px then change its opacity level to 4%.

Step 28
As for the last step, select all the layers and drag them to the Create a New layer icon as shown in figure (a). Next, merge all of them by right-clicking in the layers panel and selecting Merge layer from the drop-down menu as shown in figure (b). Lastly, go to Filter > Blur > Gaussian Blur and set its radius to 5px as shown in figure (c).

Erase the area as shown below using the indicated settings.

Conclusion
That’s it! Hope you had fun working on this project and learned many things that will help you in the future!